Monday, March 28, 2011

Lemon Curd 101 aka When Life gives you Lemons


2011 March Lemon Curd 101

Lemon Curd, Makes 3 small 1/2 Pint jars.

3 Lemons

1 Cup Sugar

1/2 Cup Unsalted Butter

2 Large Eggs

1 Large Egg Yolk

Before starting make sure all your utensils are clean. It is very important that you have a clean environment when doing any type of food preparation, especially canning. Put 3 half pint jars and their lids in a large pot cover them with water. Bring to a boil over high heat. Boil for 10 minutes to sterilize. Keep the jars in the water until you have finished preparing the curd. Also fill a large saucepan with water to use as a double boiler with a heat proof glass bowl. Turn the heat under the saucepan to medium until it is hot and then turn it down to simmer.

IMG_3038


In the meantime, while the pots are doing their thing, Zest 2 lemons.

IMG_3039


Chop the zest onto a cutting mat into fine pieces. Boy, if Santa would of brought me a Microplane, I would only of had one step instead of two! Place the finely chopped zest into the glass heat proof bowl.

IMG_3041


Squeeze the 3 lemons making sure to remove all seeds by straining it. Pour that into the bowl along with the zest.

IMG_3049


Place the bowl over the pan of simmering water.

IMG_3042


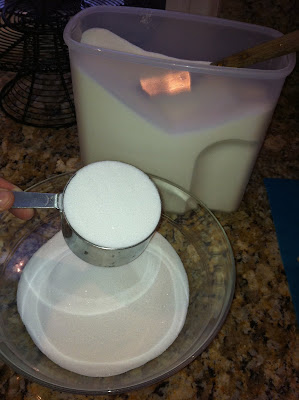
Pour 1 cup sugar into the lemony goodness.

IMG_3044


Place one stick of unsalted butter in the bowl as well. Mix all ingredients together while waiting for the butter to melt. Make sure you have the temperature on simmer.

IMG_3046


In the meantime, take 2 whole eggs and place them in a bowl. Take 1 additional egg and separate it from it's white and add the yolk to the other 2 eggs.

IMG_3050


Beat the eggs well.

IMG_3053


Keep an eye on the saucepan and keep stirring. You can see here how the butter is melting, once it is all melted, take a fine sieve and place it on the pan.

IMG_3054


Pour the beaten eggs slowly through the sieve into the lemony buttery, goodness and begin stirring. Remember to stir immediately, these are eggs and you don't want scrambled eggs!

IMG_3060


You will stir the mixture over the simmering water for 8 minutes, until it is the consistency of melted ice cream.

IMG_3062


See the 8 minutes! Set a timer!

IMG_3063


Keep stirring and waiting! When it is finished turn the fire off under the pan.

IMG_3065


Very carefully take your jars and lids from the boiling water emptying the water from them as you take them out. Place them face up on a clean towel.

IMG_3067


Place your funnel in the sterilized jar.

IMG_3068


Pour your curd into the jars within 1/4 inch from the top.

IMG_3070


With a CLEAN damp cloth, wipe the top edge of the jar removing any remnants of curd that may of gotten on them.

IMG_3072


Place the lid on top of the jar. Screw the band onto the jar.

IMG_3073


Invert your jars while they cool to room temperature.

IMG_3074

These must be stored in your refrigerator for up to 3 weeks. When you use the curd, use a clean spoon each time you take curd to keep it fresh and yummy! Remember to REFRIGERATE.

This recipe is from a new cookbook I purchased recently at Anthropologie. It is called Canning for a New Generation by Liana Krissoff. The directions were clear and concise and if you are thinking about doing any canning I would recommend this cookbook.

Tuesday, March 22, 2011

Strawberry Jam 2011

Select ripe, red delicious fruit. They should be red all the way up past their "shoulders". Prepare your jars by sterilizing them.


Wash your fruit well.

Remove the stems and leaves from the top of the berries. Also if there are any bruised areas, remove those as well.

Slice the fruit using this wonderful strawberry slicer from Sur Le Table. Of course you can do it with a paring knife as well!

When you have enough berries cleaned and sliced, place them in a measuring bowl until you have 5 cups.

5 Cups of sliced fruit.

Add two tablespoons freshly squeezed lemon juice to the fruit.

Measure out exactly 7 cups of granulated sugar into a separate bowl in preparation for adding later.

Place fruit in large pan on stove, stir in one package Pectin and 1/2 teaspoon margarine or butter to help reduce foaming.

Turn your stove on medium high heat. Stir the strawberries and the pectin mixture until it comes to a rolling boil, that can not be stirred down. Add the sugar quickly and stir. Bring the berry mixture back up to a rolling boil and boil for 1 minute. Remove from stove. Skim off any foam and discard the foam.

Place your funnel into the sterilized jar. Ladle the jam into your prepared jars. These jars, rings and seals must be sterilized ahead of time. Read Pectin package for sterilization procedures. Ladle enough jam so that it comes to 1/8 inch from the top of the jar. Make sure you clean the top edge of the jar by wiping off any jam that may of spilt onto it, before placing the seal and ring on the jar. This recipe will make 7 half pints of jam.

Invert your jars of jam for a few hours. Turn them back over and check the "button" in the middle to make sure that they have sealed properly. The button which is in the middle of the jar, should not pop back up. If any of them did not seal, those jars will have to be kept in the refrigerator not on your pantry shelf to be used immediately. Most people use the hot water bath method after the jam has been placed in the jars. There are directions for that on the package that comes with your canner. I choose not to use that method for myself , but that is up to you. Remember that there are principles of canning and they need to be followed carefully in order to ensure the quality of preservation of the food and safety for those who eat it. Ball Canning Book has a wonderful book on canning for those who would like a good resource.

This is my sister and I after spending the day jamming! We made 66 jars of strawberry jam, using 2 1/2 flats of berries, tons of sugar, multiple boxes of pectin 6 meyer lemons, and lots of love!

Posted by Picasa

Wednesday, March 09, 2011

January 2011, Lynnie, my friend

Lynnie and I have a common love in gardening. She is a meticulous gardener and can take a overgrown shrub and shape it into a beautiful display for everyone to enjoy.


The other thing I admire about her is her love of creating beautiful vignettes. This is her mantle in her home which she designed.

Posted by Picasa

Sunday, January 16, 2011

January, 2010 My Newest Interest


I have been taking snapshots of Vintage and New Airstream Travel Trailers for the past few years, as I have grown to love them. I am sure my affection for these silver fuselages on wheels has something to do with our familys aircraft interest. My father, sister, brother, brother-in-law have been involved in the aircraft business at some point in their lives. Recently, I have been very interested in the newer ones especially the Basecamp. So next time you are on the road and one of these silver beauties is sharing the road with you take a moment to appreciate the workmanship and details.

Sunday, January 09, 2011

January 2011 Remembering Nancy Luckey

The Luckey Family and Friends gathered today at the Stonefire Grill in Fountain Valley to visit with Lauren and Kyle before they return to Italy. We also met to share in remembrance of Nancy Luckey, Bill's wife, Lauren and Haley's Mother and Maria's daughter. The girls organized a balloon release in her honor. Lauren shared that the balloons were being sent up to Nancy in heaven. I am sure Nancy was smiling down on all!
Posted by Picasa